Masks On A Mission

In response to a call from Topeka’s medical community the Board of Directors has approved a volunteer project to create and donate masks to Stormont Vail Health and the University of Kansas – St. Francis Campus.
Members are asked to track time, supplies and number of masks made – a sign up will be created to log this information.
Kim Sixkiller, President Elect, and Brie Parks, President Elect Elect, will be picking up masks from anyone who needs that service. Please email or call them for assistance.
Donations will then be given to representatives of both hospital systems.
Both hospital systems require that masks be 3 layers of cotton or flannel. For Info from Stormont Vail Health please click Here
With all donations please include THIS DONATION FORM or paper with that information.
PATTERNS & INSTRUCTIONS:
Type 1 –
Specifications:
- 100% Cotton fabric or flannel is preferred, blended fabrics will be accepted (at least 3 layers)
- Pleated rectangle pattern (6”x9” or 7”x9” starting measurement approved)
- May use elastic or ties for securing the mask
- Prefer to have two different patterns on the outside of the mask if possible
Supplies:
- Cotton Fabric (3 pieces of 6″ x 9″)
- Elastic (1/4″ or 3/8″), (2 – 7 pieces)
- Straight Pins (1 package)
- Sewing Machine (1)
Step by Step Instructions:
- Cut pattern pieces out on the cotton fabric (6” x 9”)
- Fold right sides together of two pieces with extra 3rd piece in the center, matching 9-inch sides
- Sew along the 9-inch side, using ¼” seam allowance and leaving a space 3” wide in the center to turn the mask right side out
- Cut 2 pieces of elastic 7 inches long, insert into the corners of the two open ends of the mask and pin in place. Sew across the sides, backstitching well over the elastic, to secure the elastic in place.
- If no elastic is available, may substitute 4- 16” Fabric Ties at each corner
- Turn mask right side out and press seams flat.
- Fold up to 3 pleats on each side, making sure the pleats are folding in the same direction. Pin into place.
- Topstitch around the entire mask, securing the pleats and closing the opening.
*Please be sure to use at least 3 layers of fabric on each mask
*For Child sizes: use 5”x7.5” rectangles; elastic stays at 7” length; fabric tie length at 16”
TYPE 2 – WITH PATTERN
Pattern/Instructions link:
https://wholefully.com/fabric-face-mask-donate/
Materials 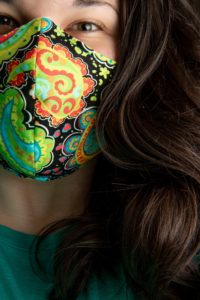
· Face mask pattern (adult)
· OR Face mask pattern (child)
· (1) 7″ x 14″ (6” x 11” for child size) outer layer fabric (tight-woven cotton)
· (2) 7″ x 14″ (6” x 11” for child size) lining layer fabric (tight-woven cotton)
· (2) 14″ pieces of thin elastic (cord or flat-woven)
Tools
· Scissors
· Marking pen
· Needle or sewing machine
· Straight pins
· Iron
Instructions
1. Cut out the pattern pieces.
2. Fold your outer layer fabric right sides together so the two short ends match up. Pin the pattern in the top right corner of the folded fabric, and pin it in place, making sure to pin through both layers of fabric.
3. Cut around the pattern piece, making sure to cut through both layers of fabric. Unpin the pattern piece and set aside. You now have two mirrored fabric pieces of the pattern piece.
4. Repeat with the pieces of lining fabric.
5. Grab the two pieces of the outer fabric, and match them up, right sides together. Pin along the curved edge of the pieces, making sure to pin through both layers of fabric. Repeat with the lining fabric pieces.
6. Using a 1/4” seam allowance, sew along the pinned (curved) edge of both the outer and lining fabric pieces.
7. Open the pieces and press the seam open using an iron—the pointed edge of an ironing board helps to make this easier.
8. Line up the outer and inner layers, right sides together, at the center seams. Make sure the pieces are facing the same direction—the top of the outer layer is lined up the top of the inner layer. Pin all the way around the outside of the mask.
9. Sew all the way along the edge of the face mask, leaving a 1 1/2” space at the bottom of the mask for turning.
10. Using the opening, turn the mask right side out. Use the tip of scissors, a pencil, or a metal nail file to make sure the corners are pushed out crisp.
11. Fold in the side edges of the mask about 1/2” (or use the marking from the pattern) on each side, and pin.
12. Fold in the unfinished edge (the one you used for turning the mask right side out), and pin it closed.
13. Topstitch around the outside of the mask (using a 1/8” seam allowance), making sure to not stitch over the ends of the elastic pockets.
14. Press the mask. Thread the two pieces of elastic through the two elastic pockets on either side of the mask.
15. Double knot the end of the elastic to finish it to make the elastic length whatever is comfortable.
Notes
· If you can, use a different fabric for the lining than the outer layer, so that health care professionals can remember which side faces the patient, and which should be towards their face.